Friday 25 September 2015

Make your Computer Welcome You

Do you watch movies? Have you always loved the way how Computers in movies welcome their users by calling out their names? I bet that you too would want to know how you can achieve similar results on your PC and have a computer said welcome.

Then you are at the right place, this article describes exactly how you can make your computer welcome you like this.

With this trick, you can make your Computer welcome you in its computerized voice. You can make your Windows based computer say "Welcome to your PC, Username."

Make Windows Greet you with a Custom Voice Message at Startup

To use this trick, follow the instructions given below:-
  1. Click on Start. Navigate to All Programs, Accessories and Notepad.
  2. Copy and paste the exact code given below.
Dim speaks, speech
speaks="Welcome to your PC, Username"
Set speech=CreateObject("sapi.spvoice")
speech.Speak speaks
     3.  Replace Username with your own name.
     4.  Click on File Menu, Save As, select All Types in Save as Type option, and save the file as Welcome.vbs or "*.vbs".
     5.  Copy the saved file.
     6.  Navigate to C:\Documents and Settings\All Users\Start Menu\Programs\Startup (in Windows XP) and to C:\Users\ {User-Name}\AppData\Roaming\Microsoft\Windows\Start Menu\Programs\Startup (in Windows 8, Windows 7 and Windows Vista) if C: is your System drive. AppData is a hidden folder. So, you will need to select showing hidden folders in Folder options to locate it.
     7.  Paste the file.


Now when the next time you start your computer,
Windows will welcome you in its own computerized voice.

Note: For best results, it is recommended to change sound scheme to No Sounds.
You can change the sound scheme to No Sounds by following the steps given below:-
  1. Go to Control Panel.
  2. Then click on Switch to Classic View.
  3. Then Click on Sounds and Audio Devices.
  4. Then Click on the Sounds Tab.
  5. Select No Sounds from the Sound Scheme option.
  6. If you wish to save your Previous Sound Scheme, you can save it by clicking Yes in the popup menu.
  7. Click on OK.


Try it yourself to see how it works. In my personal opinion, this is an excellent trick. Whenever I start my PC in front of anybody and the PC welcomes me, the fellow is left wondering how brilliant a computer do I have.

Thursday 24 September 2015

 Enable God Mode In Windows 7 And Vista


In this tutorial i will show you to enable God Mode in Windows 7 and Windows Vista. By enabling God mode you can access all your windows setting from one folder and it makes really easy to access and change windows settings. This work 32 as well as 64 bit operating system. So lets enable God mode on your computer.

How to do it ?

  1. On your desktop right click and create a New Folder.
  2.
Rename this folder to the code given below.
GodMode.{ED7BA470-8E54-465E-825C-99712043E01C}

  3. Done now double click on this folder and you will have access to all your windows operating system settings.

Download Youtube Videos Without Any Software


This is simple YouTube trick which will allow you to download any youtube videos without any software or programme and in many different video formats such as mpeg4, 3gp, hd and many more from within the youtube site.
How To Download Youtube Videos ?
1. First Go to Youtube Homepage.
2. Then select the video you want to download. I will demonstrate with video url given below.
·         Now add save or ss or kick before youtube and press enter.
3. After adding any of the above keyword the above link will become.

4. Now you will be redirected to a new page from where you can download youtube videos in any format of your choice. You may also download only the soundtrack of the video in mp3 format. 

For more latest Tips&Tricks keep visiting my website.


Awesome VLC Media Player Trick

Password Protect Any Folder Without Any Software


In my previous post i have teach you to hide files behind images. In this tutorial i will show you interesting and usefull trick to password protect folder without using any software using batch file programming. This trick will work on all windows platform (Win XP, Win 7). Follow below tutorial to learn this trick.


How To Lock Folder ?
1. Open Notepad and Copy code given below into it.
cls
@ECHO OFF
title perfectit4u.blogspot.com
if EXIST "Control Panel.{21EC2020-3AEA-1069-A2DD-08002B30309D}" goto UNLOCK
if NOT EXIST MyFolder goto MDMyFolder
:CONFIRM
echo Are you sure to lock this folder? (Y/N)
set/p "cho=>"
if %cho%==Y goto LOCK
if %cho%==y goto LOCK
if %cho%==n goto END
if %cho%==N goto END
echo Invalid choice.
goto CONFIRM
:LOCK
ren MyFolder "Control Panel.{21EC2020-3AEA-1069-A2DD-08002B30309D}"
attrib +h +s "Control Panel.{21EC2020-3AEA-1069-A2DD-08002B30309D}"
echo Folder locked
goto End
:UNLOCK
echo Enter password to Unlock Your Secure Folder
set/p "pass=>"
if NOT %pass%== SECURITY goto FAIL
attrib -h -s "Control Panel.{21EC2020-3AEA-1069-A2DD-08002B30309D}"
ren "Control Panel.{21EC2020-3AEA-1069-A2DD-08002B30309D}" MyFolder
echo Folder Unlocked successfully
goto End
:FAIL
echo Invalid password
goto end
:MDMyFolder
md MyFolder
echo MyFolder created successfully
goto End
:End
2. Save the notepad file as lock.bat (.bat is must)
3. Now double click on lock.bat and a new folder will be created with name MyFolder
4. Copy all your data you want to protect in that New folder
5. Now double click on lock.bat and when command promp appears Type Y and press enter.
6. Now MyFolder will be hidden from you view, to access that folde double click on lock.bat
7. It will ask for password enter your password and done. (Default password is security)
·         To change the password replace Security with new password in the above code
How To Further Secure ?

You might be thinking that anyone can access the password by opening that lock.bat file in Notepad or any other text editor. To make it more secure hide lock.bat in some secure location after following the above tutorial To access the secured file double click on lock.bat. I would suggest copying lock.bat file into Pendrive and copying it into your computer whenever you required to access to your protected files. 

Wednesday 23 September 2015

Learn To Hide Files Behind The Images


There are some important  files or document you want to hide from others on your computer. To do that you might be creating folder inside folder to hide such files but in todays tutorial i will change this by teaching you a interesting trick to hide files behind images.To hide a file behind a image  means that if any one opens that image he will see the image, but to see the hidden file we need to open that image in a specific way. So lets get started.


How To Hide File Behind Image ?

In order to do this you should have basic understanding of command line, but if you don't know check out  tutorial given below.
1. Select an image to be used for hiding file behind the image.
2. Now select a file to hide behind the image and make it in .RAR format. With the help of the WinRAR.(Download winrar)
3. And most important is that paste both the files on desktop. You may do this anywhere instead of desktop if you have some basic understanding of command line.
4. Now open cmd by going to Start > Accessories > Command Prompt and type following commands in it.
cd desktop

5. CD stands for change directory by typing above command you change your directory to desktop. After that type command given below.

 Copy /b imagename.jpg + filename.rar finalimage.jpg


  • Replace imagename.jpg with the name of image you want your file to be hidden behind. Don't forget to add image format (Eg: .jpg,.png,.gif)

    • Replace filename with name of your file you want to hide. It must be in .rar format.
    • Finally Replace finalimage.jpg with whatever name you want your final image with hidden files should be. This is the image where your file will be hidden.
    6. Now when you will try to open this newly created image it will open as normal image, but to open you hidden file you need follow steps given below.
    How To Access Hidden File ?
    To access your hidden file you need to open the newly created image in winrar. Just follow simple steps given below to do that.

        1. Open winrar
        2. Now locate your image and open it or simply drag your image in winrar.
        3. Extract the file and done.

    Sunday 20 September 2015

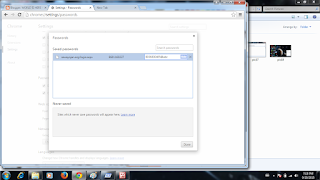
    HOW TO VIEW SAVED PASSWORD IN GOOGLE CHROME

                         HOW TO VIEW SAVED PASSWORD IN GOOGLE                                             CHROME

    1.Open the google chrome browser.
    2.Click on the search tab (As shown in the figure)


    3.click on the setting tab.


    4.click on the show advance setting.


    5.click manage password option.


    6.In the manage password option you get saved password list. 


    7.Click one of the following and clIck on show button.Here you get password.


    Now enjoy your self

    Thank for reading.

    Set up a computer-to-computer (ad hoc) network

            Set up a computer-to-computer (ad hoc) network


    An ad hoc network is a temporary connection between computers and devices used for a specific purpose, such as sharing documents during a meeting or playing multiplayer computer games. You can also temporarily share an Internet connection with other people on your ad hoc network, so those people don’t have to set up their own Internet connections. Ad hoc networks can only be wireless, so you must have a wireless NETWORK ADAPTER installed in your computer to set up or join an ad hoc network.

    click to open network and sharing center.
    click to manage wireless network.


     click to add button.


     click on create an ad hoc network


     fill the required information,
       such as network name=adhoc ,security type=wpa2-professional
       security key=123@qwe, check save the network tab.


     process start to create ad hoc network.


     then click close button.

    click on the network icon tab on the corner of the screen to view
    the newly created ad hock network. as shown in the figure.


    For more latest update to visit my website perfectit4u.blogspot.com